Under this selection the user must complete fields.
Intro – Header: The user must give an heading for the voting.
Intro – Description: The user must give the description about the voting.
About Page: The user must enter detailed information about the page.
Please note: All the above fields are mandatory and must be filled by the user.
Once the fields i.e. (General/Customized & More) are completed the user must click on “Create”.
Upon clicking on create; the page will get redirected to another screen with the following note:
"You need to create Voting type and Voting Field".
The user must click on Voting Type link to define the type of voting for the external user. By clicking on Voting type the page will display a dropdown with the following list:
Voting type (List)
Selection - If the user selects this option then the external user/voter will notice a "Vote" option under the submission while voting.

The user must select the Maximum Selection (This is given in numbers) to create the voting type.
Maximum Selection – The maximum number of vote a person can make.
Example:
Choose your 2 favourite categories
CAT - A
CAT - B
CAT - C
CAT - D
Yes/No - if the user selects this option then the external user/voter will notice couple of icons under the submission while voting.

The user must select the Maximum Selection (This is given in numbers) to create the voting type.
In addition, the user must select either of the following options from the "Icon" selection list
Yes/No
Up/Down
Correct/Wrong
Example:
Would you like to nominate CAT - A
Yes/No
Rating - By selecting this option the external user/voter will notice "star icons" under the submission while voting.
The user must select the Maximum Selection (This is given in numbers) to create the voting type.
In addition, the user must select the "star" option from the "Icon" selection list.
The user should define the Minimum and Maximum points.(This selection shows the number of star icons during the voting process).
Example:
Please rate the following categories (1 to 5 stars).
CAT - A
CAT - B
CAT - C
CAT - D
Upon making the necessary selections the user must click on "Create" tab, which will redirect to define Voting fields.
Voting Fields
In this page the user will notice 3 options, namely:
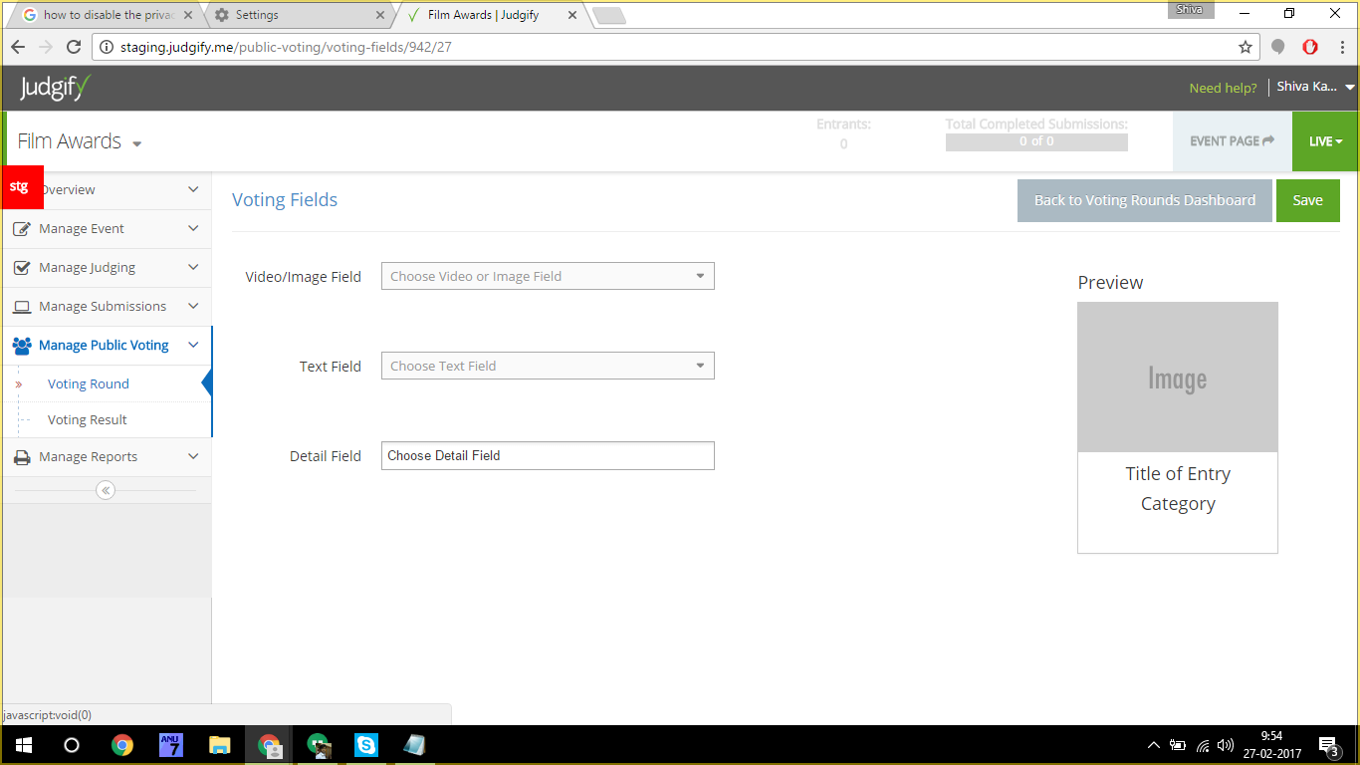
Video/Image Field - User must choose either a video or an image label. These are the submission(s) which are made by the entrant.(This content will be visible to the external voter during the voting process).
Text Field - allows the user to select the Text Field from the given dropdown list. The selection made will appear on the right side of the preview window.
Detail Field - allows the user to select multiple fields which is made visible during the voting process.
In addition to the above the user will notice a "Preview" on the right side of the screen. This is the representation of the submission appearance during voting which is visible to the external voter.
Upon making the necessary selections the user must click on "Save" tab.
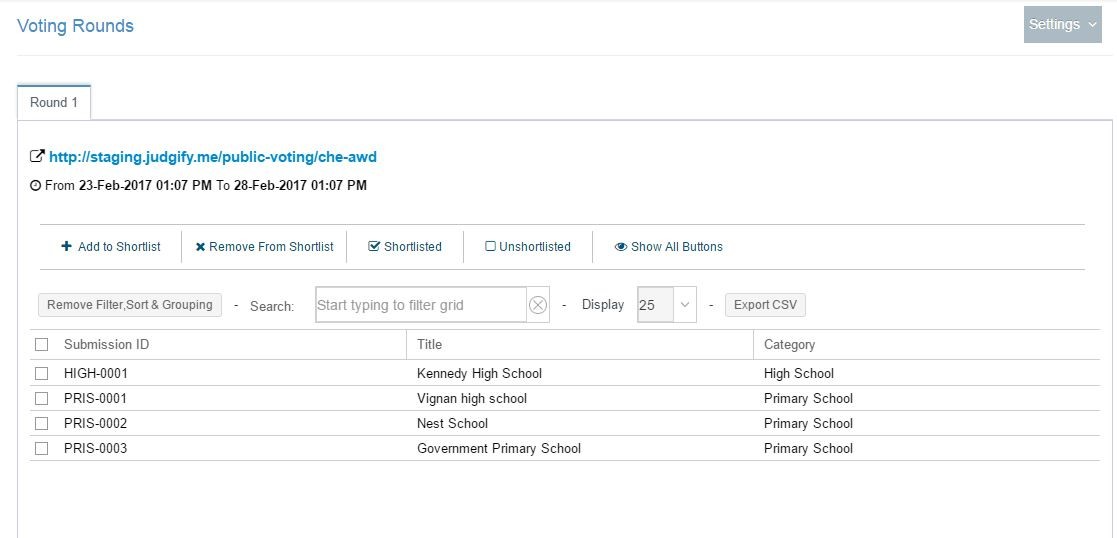
On this screen, you can find the following contents:
Submission ID
Title
Category
In addition the voting URL and the start date/end date can also be seen.
Above the tabular column the following buttons are visible:
Add to shortlist - The submission in the list can be shortlisted by selecting each submission(s) and click on "Add to shortlist" button. Only shortlisted submissions will be appearing in voting page.
Remove from Shortlist - The submission(s) from the list can be removed by using this option.
Shortlisted - Displays list of shortlisted submission(s).
Unshortlisted - Displays list of unshortlisted submissions.- Show All Buttons - By clicking on this button the display will re-arrange all the above options.
The user can use the "Remove Filter, Sort & Grouping" option to remove a particular filter or a sorting/group. The "Search" option can be used to search a particular submission(s) or their detail(s).
The data display can be changed by clicking on the "Display" option and finally a report can be generated using the "Export CSV" option.
On the top right corner, the user can notice a "Settings" tab. By clicking this tab the user can edit voting, voting types and the voting fields. Every time the user makes changes they must click on the "Update" tab.
Voting Result
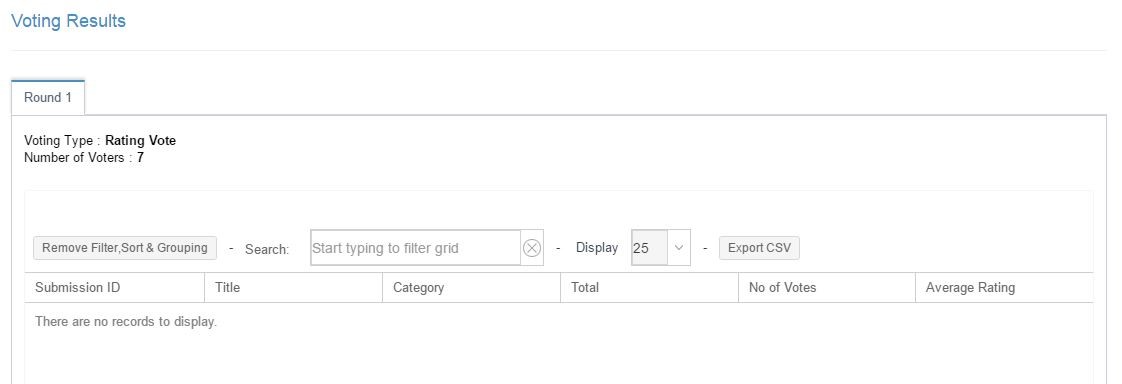
To check the voting result the user must click on "Manage Public Voting" and then click on "Voting Result".
Upon clicking the same a page will display a tabular column with the following contents - Submission ID/ Title/ Category/ Total/ No of Votes/ Average Rating.
In addition to the above the "Voting type" and the "Number of voters" (in numbers) are displayed.
Above the tabular column the following options are visible:
Remove Filter, Sort & Grouping - This option allows user to remove a particular filter or a sorting/group.
Search - This option can be used to search a particular submission(s) or their detail(s).
Display - The data display can be changed by using this option.
Export CSV - A report can be generated using this option.
Was this article helpful?
That’s Great!
Thank you for your feedback
Sorry! We couldn't be helpful
Thank you for your feedback
Feedback sent
We appreciate your effort and will try to fix the article