This article gives a brief overview of the UI of the main screens of the application.
Events Listing Page
Once you log in to Judgify, you will be presented with the Awards Listing Page which essentially contains a listing of all the events which are in Live/Draft and Archive mode.
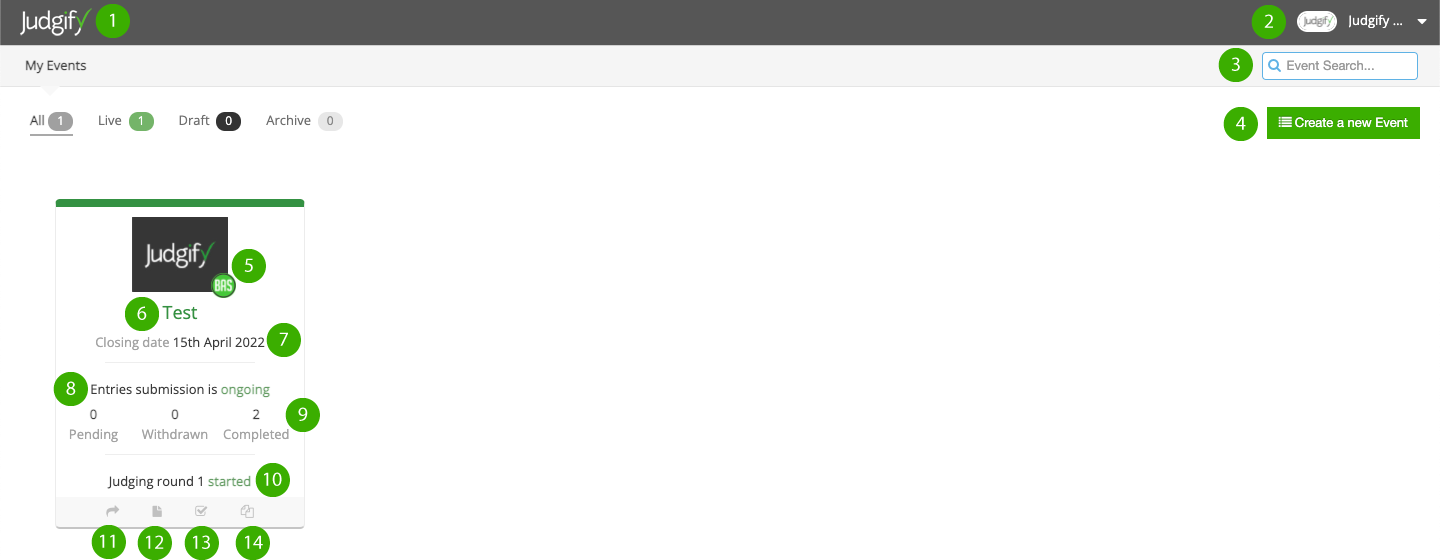
The main portions to note on this screen are the following:

Logo - If you click on the Judgify logo on the top left-hand corner of your screen, it will redirect you to the events listing dashboard.
Profile - From the top right corner of the screen you can access the Event Dashboard, Profile/Admin console and Logout tabs.
Event Search - Use this search option to look up events using the name of the event.
Create a new event - Click on this button/tab to create a new event.
Event Plan - This shows the plan/subscription of your event.
Event Name - Click on an event name to access and manage that event.
Event Closing Date - The closing date of an event can be viewed beneath the Event name.
Entry Submission Status –This shows the event submissions are ongoing or ended.
Submissions Count - Displays the number of pending, withdrawn and completed submissions.
Judging Round Status - Displays the status of the judging round (No round, started or ended).
Event Summary page - By clicking this option, the page will be redirected to the summary page where you can edit and tweak the information.
Submission page- By clicking this option, the page will be redirected to the submission page where you can view the information about the event and registration.
Judge Page - By clicking this option, the page will be redirected to the Judging page.
Clone Event - This option is currently available only for the Super Admins.
Chat support - As soon as you click on "Create a new Event", the Chat support icon will appear at the bottom right of the page to get in touch with our support team. You need to fill in the details like Name, Email address and your question and then click on CHAT.

Was this article helpful?
That’s Great!
Thank you for your feedback
Sorry! We couldn't be helpful
Thank you for your feedback
Feedback sent
We appreciate your effort and will try to fix the article