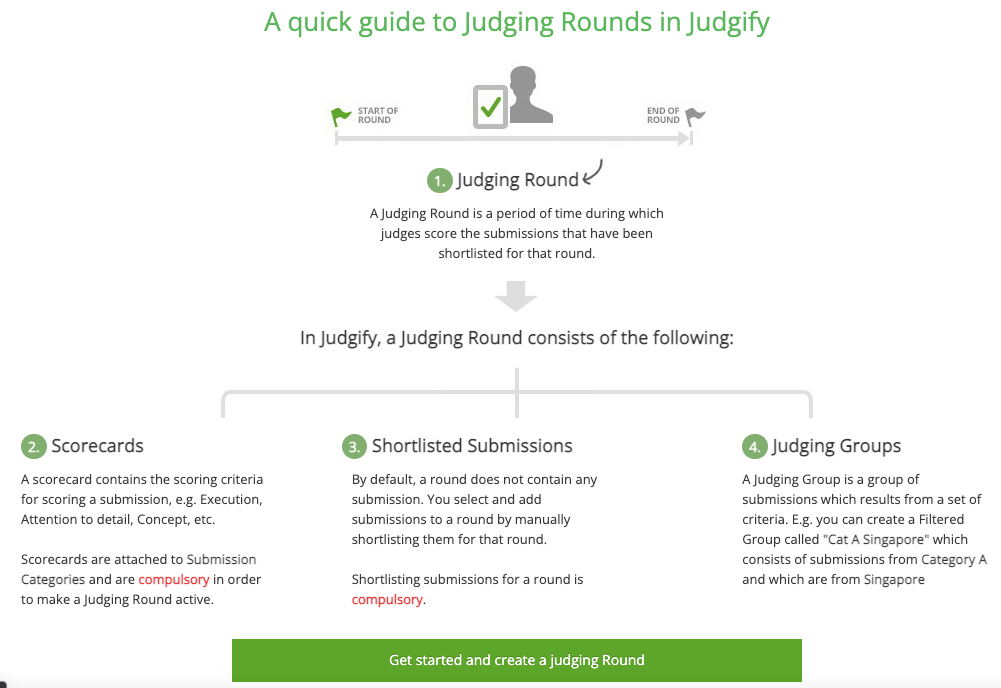
A Judging Round is a period of time during which judges score the submissions that have been shortlisted for that particular round.
To create a Judging Round, the user must click on the "Manage Judging" option from the left panel and then click on Judging Rounds.
This will redirect the user to the page with “A quick guide to Judging Rounds in Judgify”. On the same page, the user needs to click on “Create New Round” or "Get started and create a judging Round".

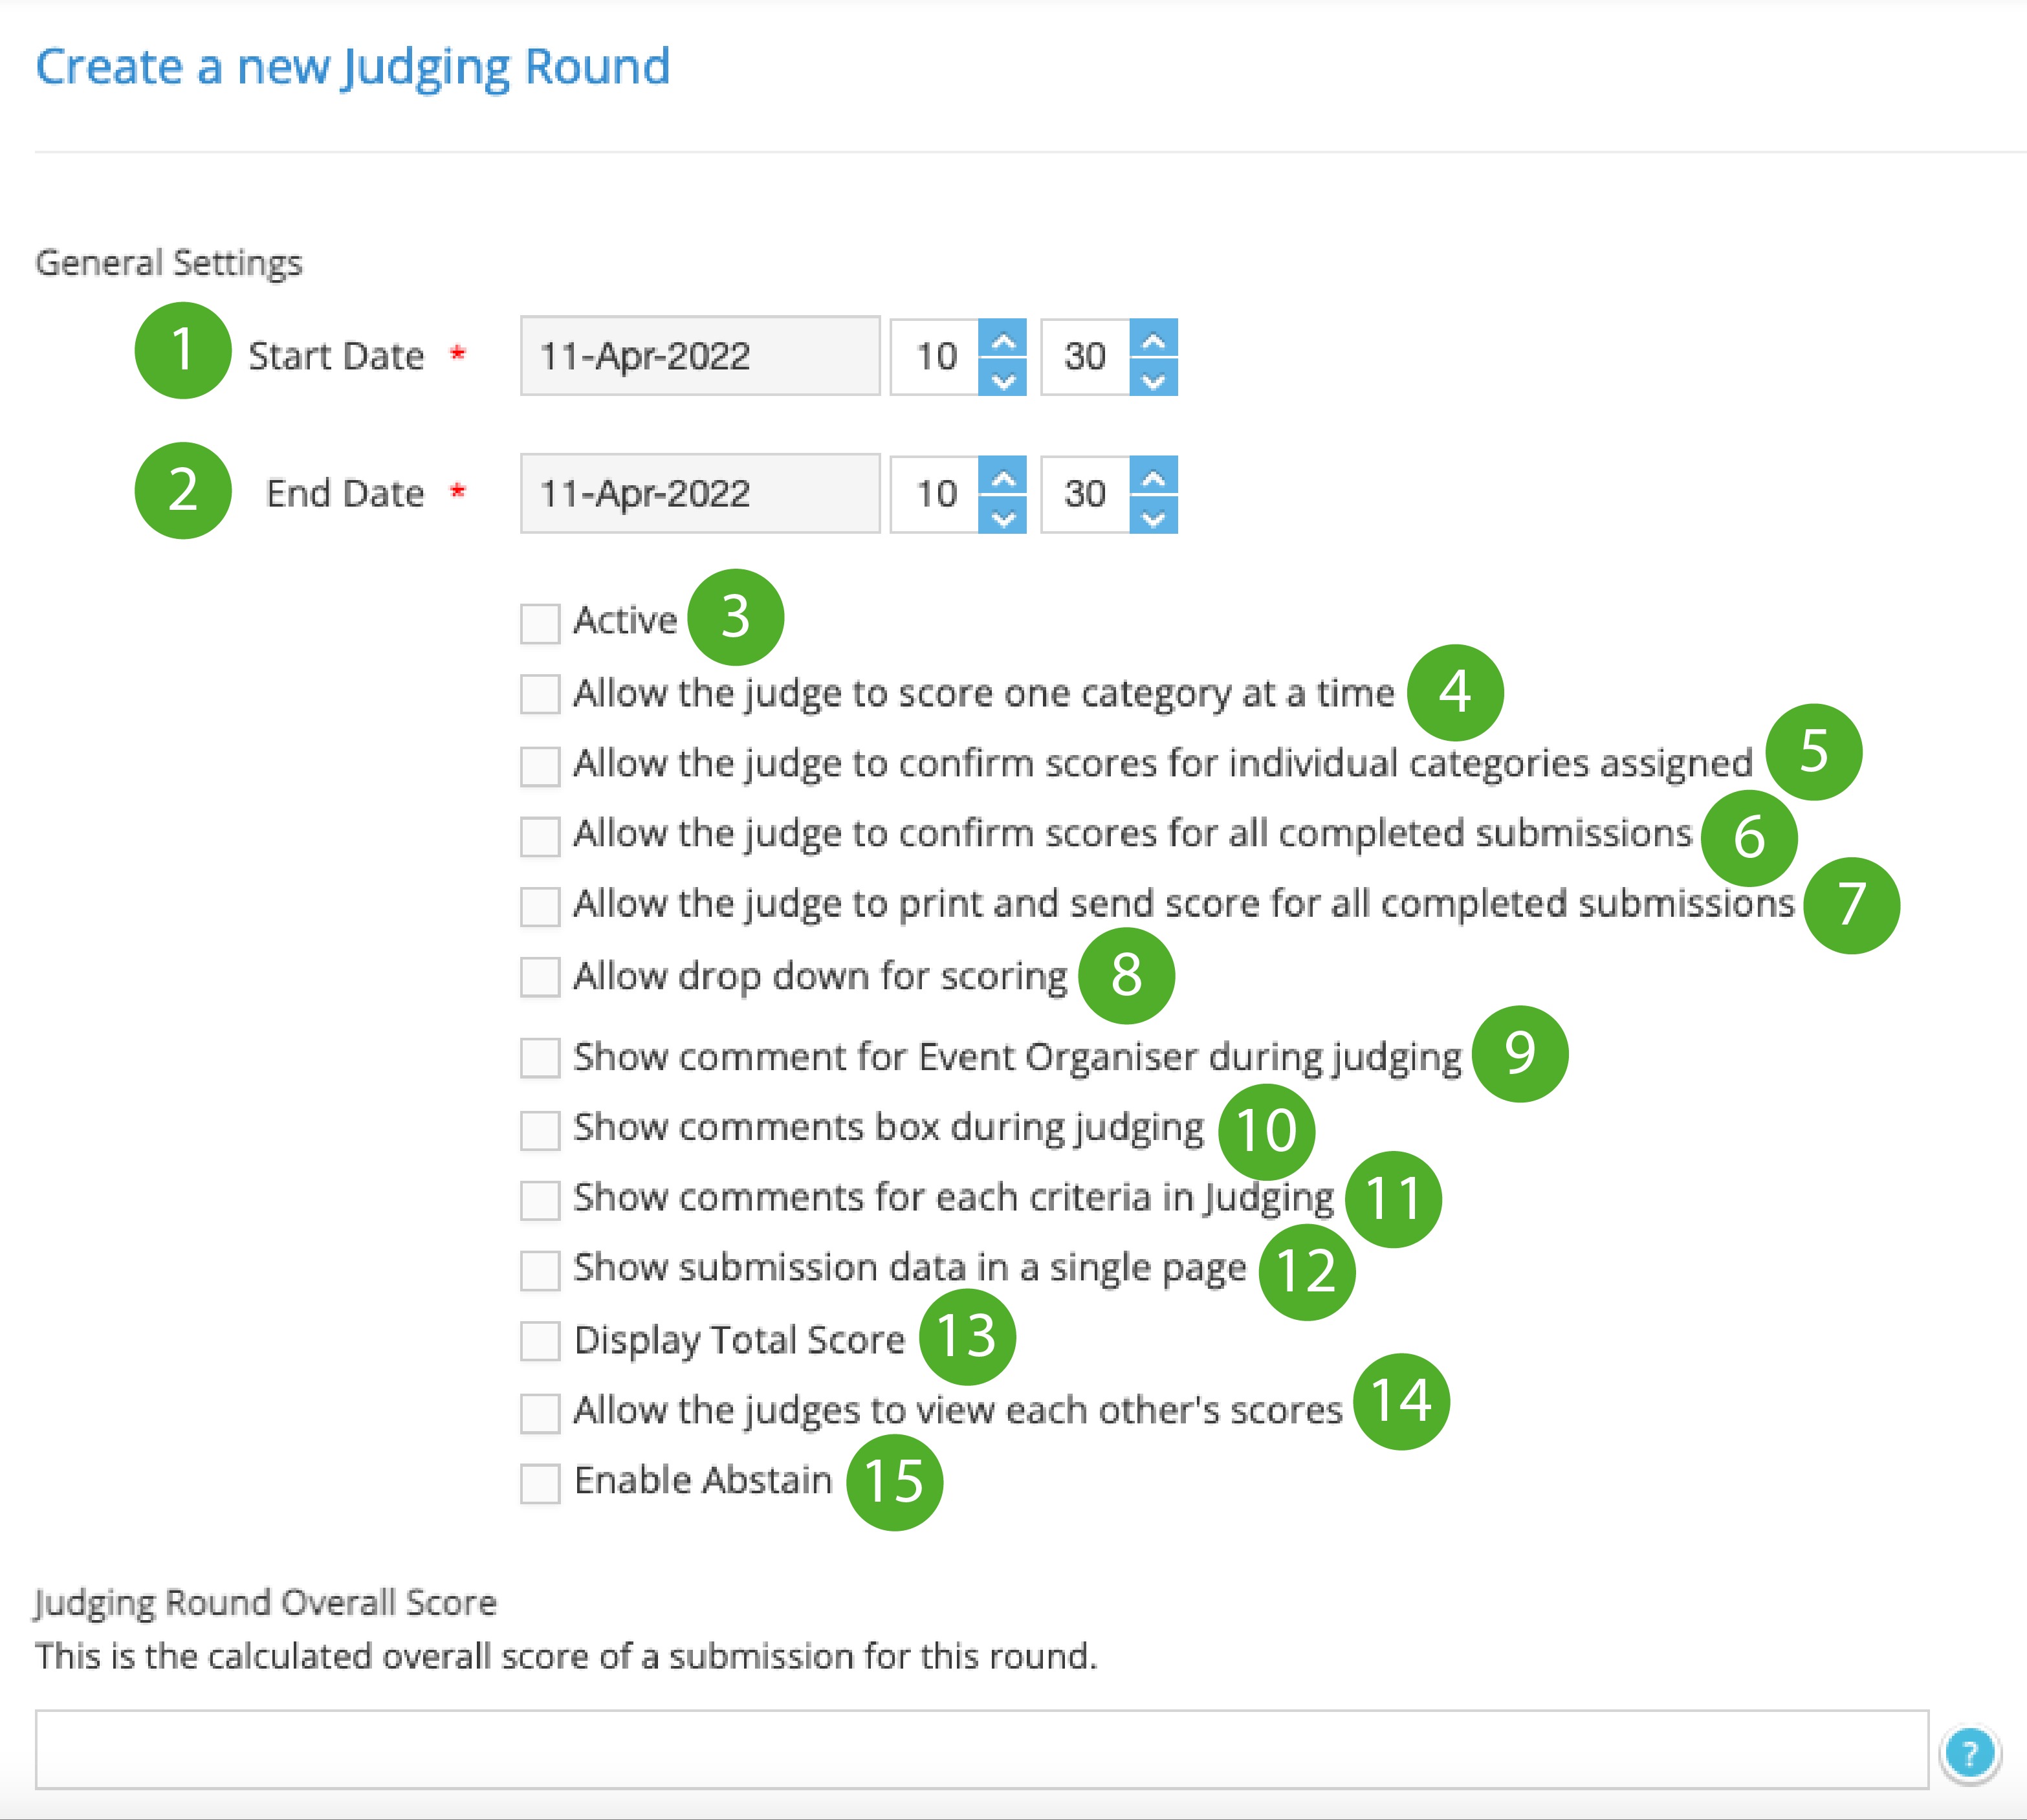
The page will be redirected to “General Settings” where you can see the following options:

Start Date - Allows you to enter the judging start date and time (Within the current date)
End Date - Allows you to enter the judging end date and time (Within the current date)
Active - This option is to trigger the judging round active or inactive. The judging round will be active if the current date is within the “Start Date” & “End Date” and the status must be changed to “Active”.
Allow Judge Score by one category at a time - In the Judge view during the scoring process, the assigned submissions will be listed by category where the Judge cannot go to the next category unless the scores are completed in the current category.
By enabling this, the system will force the Judge to finish the scores in the current category first. (Select as per requirement)Allow the judge to confirm scores for individual categories assigned - The platform will prompt the Judge to confirm scores once he/she completes scoring one particular category. (Select as per requirement)
Allow the judge to confirm scores for all completed submissions - By checking this option the platform will prompt the Judge for confirmation upon scores completed in all categories. On clicking confirm, the Judge won’t be able to update the scores later. (Select as per requirement)
Note: Do not select the 5 & 6 options at the same time.Allow the judge to print and send scores for all completed submissions - Show the print button and send the email button after confirmation of scores. This will trigger an email to the judges with the scores in a pdf format (Select as per requirement)
Allow drop-down for scoring - By checking this option, only allows the judge to select predefined values and restricts the Judge to typing score in decimal points.
Show comment for Event Organiser during judging - This will allow the judge to provide his/her comments for the event organizer. (Only available for Enterprise plan users)
Show comments box during judging - Allow Judge to add remark on entry (Select as per requirement)
Show comments for each criterion in the Judging - This will allow the judge to provide his/her comments for each criterion set up in the scorecard. (Only available for Enterprise plan users)
Show submission data on a single page - By default in Judge view, there are “Pending” and “Completed” tabs. By enabling this, both will show in the same tab. (Select as per requirement)
Display Total Score - (Select as per requirement)
Allow the judges to view each other's scores - (Select as per requirement)
Enable Abstain - (Select as per requirement)
Judging Round Overall Score
By default, the Judging Round Overall Score of submission is its total score, i.e. the sum of all the scores given by each judge for that particular submission, for that round.
However, you can also do averages by using, e.g. Total Score / Total Number of Assigned Judges.
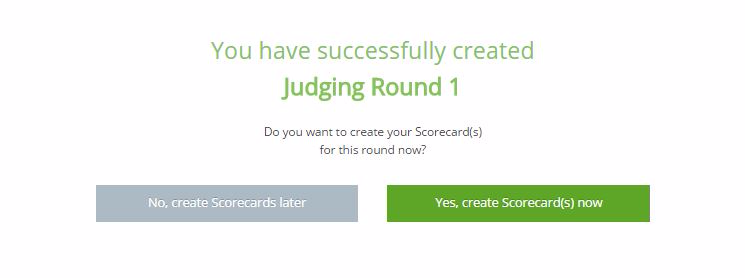
After selecting the desired options, click on Create. You will get the message “You have successfully created Judging Round 1” on the screen.
In addition, you will find “Do you want to create your Scorecard(s) for this round now?”

Was this article helpful?
That’s Great!
Thank you for your feedback
Sorry! We couldn't be helpful
Thank you for your feedback
Feedback sent
We appreciate your effort and will try to fix the article